| Before You Begin: An armature is the support structure for your sculpture. There are many ways to create a good armature and the following is just one. Before you begin on your armature it is a good idea to have a finished product in mind in terms of the finished sculpt and also how that sculpt is going to be molded. For this tutorial I am sculpting a little cave troll. I wanted him to have short legs and long arms like a knuckle walking creature. I know that I am going to mold this sculpt and cast plastic copy's, so I make some of those decisions even now with the armature. The arms are going to be removable so that I can mold the sculpt in 3 separate pieces (body, right arm, left arm) and assemble them later. The more planning you put into the armature- the less work you will have to suffer through later. Think of the armature as the bones of your creature and as you construct it you are defining your creature's anatomy. So let's get started. Materials:  Because of the small size of this sculpt, about 7 IN. at its highest point, I'm using bundling wire (found at any hardware store). I need my armature to be very strong and thin. If you use armature wire I recommend that you wrap it with thin wire to give your clay something to bite on to. As you can see in the picture to the right I took 3 lengths of the bundling wire and wound them tightly together with a power drill. This wound wire is very strong, it is much harder to bend without tools and that's the way I like it. If you need the wire to be stronger or weaker just wind more or less pieces together. A great product for binding separate pieces of wire together (or armature wire) is Fast Steel, a 2 part epoxy putty (I recommend that you use rubber gloves). You can see in the picture to the left that I used Fast Steel to bind the legs and arms to the spine. Since the arms of my troll will be removable, I used brass square stock piping (found at any metal supply shop) to join the arms with the shoulders. One size of brass pipe is smaller than the other so that it can snuggly fit into itself. Once we move on to the molding tutorial, you will clearly see why the arms needed to be molded separately and made to be removable here on the armature. When setting up the pose, I drilled 2 holes into a piece of wood and pushed the legs into them. Because of the small size of this sculpt, about 7 IN. at its highest point, I'm using bundling wire (found at any hardware store). I need my armature to be very strong and thin. If you use armature wire I recommend that you wrap it with thin wire to give your clay something to bite on to. As you can see in the picture to the right I took 3 lengths of the bundling wire and wound them tightly together with a power drill. This wound wire is very strong, it is much harder to bend without tools and that's the way I like it. If you need the wire to be stronger or weaker just wind more or less pieces together. A great product for binding separate pieces of wire together (or armature wire) is Fast Steel, a 2 part epoxy putty (I recommend that you use rubber gloves). You can see in the picture to the left that I used Fast Steel to bind the legs and arms to the spine. Since the arms of my troll will be removable, I used brass square stock piping (found at any metal supply shop) to join the arms with the shoulders. One size of brass pipe is smaller than the other so that it can snuggly fit into itself. Once we move on to the molding tutorial, you will clearly see why the arms needed to be molded separately and made to be removable here on the armature. When setting up the pose, I drilled 2 holes into a piece of wood and pushed the legs into them. | |
 Anatomy and Balance: Anatomy and Balance:  Your armature acts as the bones of your creature and as such it should be considered a part of the sculpture, not just something to hold your clay up. When setting up the pose for your creature- look at it from all angles- if your armature is leaning to one side then your sculpture will end up doing the same. If your armature looks like it's off balance, than the same will be true for your finished creature. Think about where the weight of your creature is and what your creature is doing. When you create your armature- ensure that it reflects the intent of your creature. My little troll here is getting ready to shift his weight to his front foot, as he lifts up his back foot, and swings his arm down- to crush some poor troll messing fool (I know, I'm a dork). While constructing your armature you should also be thinking about the anatomy of your creature. The curve of the spine, the slant and width of the shoulders and hips (if your creature has shoulders and hips) are all defined by your armature. It is very tricky to get a natural looking sculpture with a stiff and rigid armature. Some parts of your armature are easy to change and adjust while you are sculpting, such as how much bend there is in the arms and which direction the head is facing; however, changing things like the length of the torso and placement of the hips and shoulders are things that you must be sure of before you start sculpting for obvious reasons. Taking the extra time to ponder such things will only help you to create a successful armature and by extension a successful sculpture. Your armature acts as the bones of your creature and as such it should be considered a part of the sculpture, not just something to hold your clay up. When setting up the pose for your creature- look at it from all angles- if your armature is leaning to one side then your sculpture will end up doing the same. If your armature looks like it's off balance, than the same will be true for your finished creature. Think about where the weight of your creature is and what your creature is doing. When you create your armature- ensure that it reflects the intent of your creature. My little troll here is getting ready to shift his weight to his front foot, as he lifts up his back foot, and swings his arm down- to crush some poor troll messing fool (I know, I'm a dork). While constructing your armature you should also be thinking about the anatomy of your creature. The curve of the spine, the slant and width of the shoulders and hips (if your creature has shoulders and hips) are all defined by your armature. It is very tricky to get a natural looking sculpture with a stiff and rigid armature. Some parts of your armature are easy to change and adjust while you are sculpting, such as how much bend there is in the arms and which direction the head is facing; however, changing things like the length of the torso and placement of the hips and shoulders are things that you must be sure of before you start sculpting for obvious reasons. Taking the extra time to ponder such things will only help you to create a successful armature and by extension a successful sculpture. |
 Starting in with some clay:
 For this tutorial I'll be using Super Sculpey and Premo (both are Sculpey products). I use Super Sculpey for massing out my general forms and then use Premo for all my finishing work. Super Sculpey is very soft and is great for laying things down rather quickly. While Premo is rather firm and holds its shape and detail very well. These clays stay malleable until you use heat to harden them.

Massing Out your General Forms:
I start out by building out my general forms using little pieces of Super Sculpey at a time. During this phase of the sculpture I rarely use tools to carve out the muscles. I find that it's easier to build out the musculature than it is to carve it in. Keep adding more clay and keep moving, not dwelling on any one area for too long until you have the general look of your sculpture down. I like to start on the trunk and work my way out from there, but that's just a preference thing. While you are building out your forms start thinking about what the muscles are doing underneath. Don't ever be afraid to pull out an anatomy book to help you out if necessary. Even though this creature is not a human being it is based on the human form, just tweaked out a little.
That Darn Cracking Super Sculpey Problem:
Once the form is built out just shy of where I want the finished sculpt to be- I cook it in the oven. In the picture to the left you can see that prior to cooking it I separated those arms from the main body using monofilament (fishing line) for molding purposes. There are a few reasons that I do this (cook the sculpt).
 The first and foremost reason is cracking, if you cook your Sculpey in the oven- you can expect it to crack. It's too small to see in the picture (left) but there is a hairline crack going all the way down his chest.Thick Super Sculpey will almost always crack when it is cooked in the oven.There are several ways around this problem and the following is the way I like the most.
- First, mass out your form a few millimeters shy of your finished sculpt.
- Cook your sculpture in the oven.
- Say hello to those pesky cracks.
- Use super glue in the cracks to hold them together, and keep them from getting larger.
- Then finish your sculpture but this time when you cook it, use a heat gun (or a hair dryer) instead of the oven. This way you are cooking it from the outside and you can control it better. Unhardened Super Sculpey and Premo has a slight sheen to it. As you cook the outer layer with your heat gun watch for the moment that the sheen of the clay goes matte. Once an area goes matte move on to the next area and never heat one area for too long. The surface should be warm to the touch but never hot. This has always worked for me and I have never had cracks on my finished sculpts utilizing this technique.
The Finishing Layer:
Like I stated earlier I use Super Sculpey to quickly mass out a sculpt and Premo to finish it off. Starting here I am using Premo over hardened Super Sculpey. Premo takes a little longer to work with, but trust me it will be worth it once you get to texturing your sculpt and using solvents. Here is where I start to hone in on all the detail and use my sculpting tools quite a bit. If you ever find that in the previous step when you were massing out your sculpt that you built an area out too far you can simply sand that area down or shave it down with an exacto knife (watch those fingers). Premo is also much less prone to cracking than Super Sculpey and if you follow my advice on the last page and harden it with a heat gun, you should be golden.
In the previous step I was loosely laying out this little troll's musculature but in this second layer you can see that I'm building out his muscles and fat belly much more carefully, paying particular attention to the stretching and compression of the muscles and flesh.
 I used ball bearings for his eyes so I wouldn't have to worry about accidentally warping them. You can see (on the left) that his body is slightly crunching to the right as he is beginning to shift his weight to his front foot. At all stages of your sculpture remember to stay true to your creatures balance and the effect on the muscles and body for maintaining that balance. This creature is not being magically held up by ropes, he is under his own weight. Many times just thinking about what your creature is doing will inform you as to where the clay needs to be added or removed.
 Sculpting In Separate Pieces:
If you are sculpting your sculpture in separate pieces (like I am here) a great way to keep those pieces separate while making the seam match up perfectly is to separate the pieces by a layer of saran wrap. As I was sculpting the shoulder and upper arms of this little guy I did just this to keep the pieces from sticking together. The reason for sculpting a sculpture in separate pieces is when you go to mold your sculpture you want to be able to create neat two piece molds.
 When you look at this sculpture you can see that the legs are going one direction while the arms are going the other. If I were to mold this sculpture as one piece I wouldn't be able to get the arms out of the mold without cutting them out (This will be made very clear in the molding tutorial). Another option is to sculpt your sculpture in one piece and cut it into separate pieces after it's finished, but this way is never as neat in my opinion. This is why I like to plan ahead for molding from the very beginning.
 Texture Overview: Texture Overview:Texturing the sculpture is my favorite part of sculpting. Here is where you can really bring out the character of your creature and accentuate the stretching and compression of the skin. A good texture job on your sculpt can be the difference between night and day. You can really help or hurt the final look of your creature when you texture it. There should always be a great amount of thought put behind your texture job, don't just go crazy laying down random scratches in your clay and hope for the best. Texture has a direction and a purpose. Skin texture is created and is informed by movement. Take a look at the picture to the left, my little troll here is neither looking up or down but by just looking at the texture of the skin you can see that he has the ability to do both. When you are defining your creatures skin texture you are not only defining what it's doing, but also what it is capable of doing. When selecting the texture of your creature always keep in the front of your mind how that creature moves. Texturing Tools and Materials:  There are millions of different tools that you can use for texturing your sculptures. Most of the tools that I use I make myself out of different thicknesses of wire with the points filed down into different shapes. I also use some dental tools and brushes. It doesn't really matter what tools you use (a toothpick would suffice) but it's how you use your tools that really matters. The process of texturing usually involves the scratching of detail into your clay and smoothing out the rough hard edges with solvent (for oil based clays,: use water for water based clays) and a brush. For a step by step guide for sculpting realistic skin texture- click here. As you experiment with texturing and get more accustomed to doing it you will discover uses for all kinds of tools, and find the ones that work best for you. When you are texturing your sculpture it will be helpful to have at least a few different tools on hand. There are millions of different tools that you can use for texturing your sculptures. Most of the tools that I use I make myself out of different thicknesses of wire with the points filed down into different shapes. I also use some dental tools and brushes. It doesn't really matter what tools you use (a toothpick would suffice) but it's how you use your tools that really matters. The process of texturing usually involves the scratching of detail into your clay and smoothing out the rough hard edges with solvent (for oil based clays,: use water for water based clays) and a brush. For a step by step guide for sculpting realistic skin texture- click here. As you experiment with texturing and get more accustomed to doing it you will discover uses for all kinds of tools, and find the ones that work best for you. When you are texturing your sculpture it will be helpful to have at least a few different tools on hand. Texture- Direction and Transition:  As you can see on this page I have decided to texture my pieces separately. I did this so that I could more easily get around the arms, however the whole time that I'm working I'm constantly putting them back on to insure that everything is going in the right direction. When sculpting your texture remember that in different places on the body the primary texture direction will be going in different directions. Pay particular attention to the transitions from one direction to the other so that everything blends together naturally. In the picture to the right you can see that from the back of the neck to the front of the face the texture is going in almost the opposite direction. There is no one point when it jumps from one direction to the other, instead the texture transitions from one direction to the other. Even when texture changes direction quickly you will still always find transitions. In some instances the secondary texture direction becomes the primary direction but once again it transitions that way. In the above picture you can see that the primary direction on the back slowly blends into the secondary direction as it approaches the neck and visa versa. If you are ever unsure about what to do with your skin texture in a certain area, find yourself some reference material, looking to nature will always give you new ideas and inspiration. As you can see on this page I have decided to texture my pieces separately. I did this so that I could more easily get around the arms, however the whole time that I'm working I'm constantly putting them back on to insure that everything is going in the right direction. When sculpting your texture remember that in different places on the body the primary texture direction will be going in different directions. Pay particular attention to the transitions from one direction to the other so that everything blends together naturally. In the picture to the right you can see that from the back of the neck to the front of the face the texture is going in almost the opposite direction. There is no one point when it jumps from one direction to the other, instead the texture transitions from one direction to the other. Even when texture changes direction quickly you will still always find transitions. In some instances the secondary texture direction becomes the primary direction but once again it transitions that way. In the above picture you can see that the primary direction on the back slowly blends into the secondary direction as it approaches the neck and visa versa. If you are ever unsure about what to do with your skin texture in a certain area, find yourself some reference material, looking to nature will always give you new ideas and inspiration.Moving On To The Arms: Once I finished texturing the main body I hardened the Premo with a heat gun (not the oven, look no cracks). I hardened the body so that when I pushed the arms against the body to texture them the two pieces wouldn't stick together. The most important thing here is that the texture on the arms lines up with the texture on the body, so I usually do this first. Once I have lined up the texture with the body I removed the arms, as you can see some parts of the arms would have been tricky to get to if I textured them still attached (mostly on the right arm). Once the arms were finished I hardened them the same way that I did with the body (heat gun).  Finished sculpt: Finished sculpt:Once I finished my little troll sculpt, I made a rocky base for him. The base will be molded with the body as one piece, and the arms will be molded separately. All in all I'm fairly happy with how it came out considering that it is so small. For any questions that you may have regarding this sculpture tutorial I have started a thread in the Sculpture Forum (click here). As with all my tutorials I'd like to point out that this is my personal working process and is by no means the only way to work. Take what you will from this tutorial and deviate from it as much as you desire. I'm not just here to teach but also to learn, and create an atmosphere for learning. So go out and make something. Post your working process, findings and pictures in our forums and gallery and add to our ever growing artist community. |
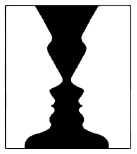 So, what is "negative" drawing? What do you see when you look at this picture on the right? Do you see an ancient black drinking cup? Maybe an ebony candlestick holder? These are the positive images. Or do you see two white faces both looking at each other? Think of these faces as the negative areas or what I call "White Space". Imagine yourself "seeing" these two faces on a white sheet of paper and then filling in the space between them in black so the faces are revealed. This is Negative drawing - seeing the space and not the line. Teaching yourself to see White Space is one of the best lessons you will ever learn.
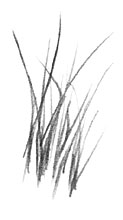
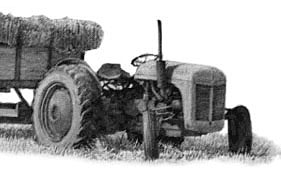 You can of course draw grass in any way you choose from "sketchy" (which serves its purpose here as this drawing is just 1½" high and the grass exists only to place the tractor in space)...
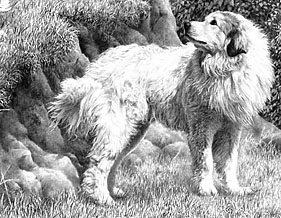 It confuses the rational element that tries to control the creative side. Let your subconscious work, it always knows best. Consider the following two examples which, I think, prove the point.
 I have two basic ways of working - both equally justifiable - "dash and rehash" and "slow 'n steady". The first often works well and it's the one I recommend for drawing grass - it contains an element of spontaneity and some surprising results can emerge. It's quick, it's immediate and requires only a little, if any, retouching (the "rehash" element). We'll come back to "Slow 'n Steady" later and then combine the two.
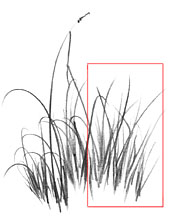
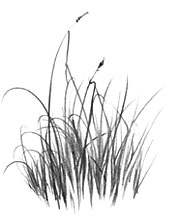
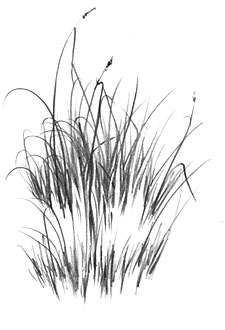
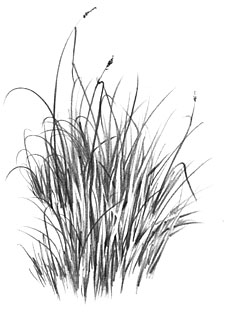
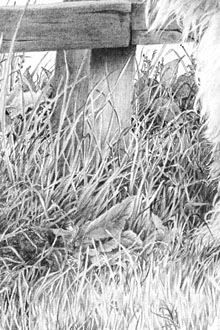


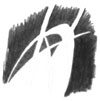
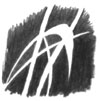
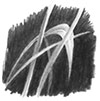
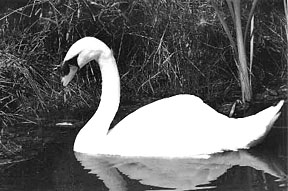 I have my friend Murray Cholowsky to thank for the photo as it represents his latest challenge and it was he who asked me how I might tackle the grass.
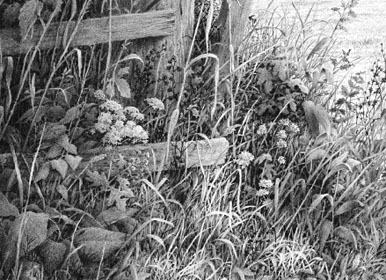
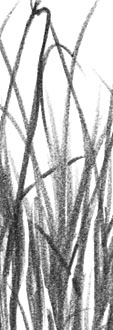
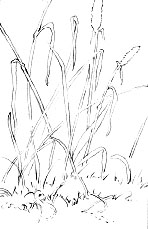 Here I would begin by mapping out the main stalks; lightly drawing a line either side to delineate the space that constitutes the stalk and leaf. Remember that you are defining white space so be aware that it is the inside edge of your line that counts - you are drawing that line around a white shape. There is only one important consideration here - what you start you must finish. Every stalk you draw must have a beginning and an end - it must go somewhere. The eye is adept at noticing elements that it cannot understand and will be "stopped" by that element in passing - distracting the viewer and damaging the sense of reality you are trying to achieve.
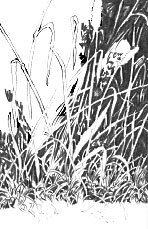 Having defined the main stalks (I call them "status" stalks - they're food for the brain) using the "Slow 'n Steady" approach, I'll switch to a more spontaneous style of working to draw the less distinct grass on the rear-most plane. Here is where you let your imagination go free, working at a pace that prevents conscious intervention. Your aim is "natural" so let Nature take over - you are, after all, one of Nature's children. And Nature knows all about balance - you will find yourself introducing stalks here and there that may even surprise you with their placement. Don't be tempted to intervene, just let Nature take over. And don't touch those "status" stalks - you cannot properly define their tonal values until you have completed the grass behind them.
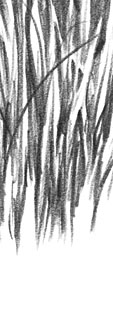
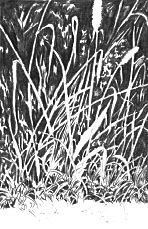 As you work on this secondary area between the established white spaces that represent the status stalks of grass, introduce random shapes and lines. As long as these vaguely follow the rules of natural grass and foliage, they will serve to fool the brain into seeing more detail than exists. In life you could not distinguish every element in such an arrangement (especially in areas of deep shadow) so you should not be able to do so here either.
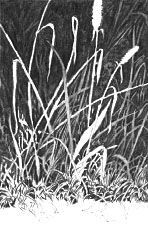 Now picture, really picture, yourself looking into that area and begin to add reality to the situation; toning some stalks down a little and others so much that they are barely discernible. Just so in Nature - not everything is seen with total clarity. If you can see the reality in your mind you will achieve a sense of reality in your drawing.
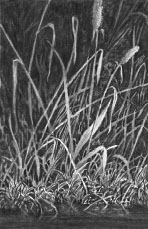 Finally, the status stalks are given body, adjusting the tone of those behind them if required.